Wednesday 27 March 2024

Farm Details IH 3 bottom plow


This is another GHQ kit. It was a nice kit to build and comes with some spare parts.  It's necessary to take the time to look at each part and ensure you understand the build.  The instructions are well done. I used CA to glue the parts on.  It is quite a delicate build so you must be gentle as you get further into the build.  It took me about 4 hrs to complete the kit.

      Here is a picture of the real thing 

 I painted it IH red using an airbrush and then hand painted the rims and tires. My model is seen as a new item at the dealership so I left the plow shears red. There is also no weathering on it.

 Can you see the difference between the first two pictures and the last two pictures?


                                                                        These are the final pictures


I saw the paint on the rim still showed red through the white, the wheel on the left side was cockeyed and the red still showed on the left tire. The steel look on the front shear is just a refection it is painted. The camera lets you see things that your eye doesn't pick up. This is why I take so many pictures of my models.  It is necessary for you to decide what you can fix and what you can live with. I also adjusted the left wheel without breaking any thing😊

Thursday 21 March 2024

Farm Details GHQ IH manure spreader


This is a kit from GHQ of a red ( IH model 200) manure spreader. It is a very nicely done kit which took almost no prep work to the castings. You do have to take your time to figure out which pieces go where from the instructions. It is not hard, you just have to take your time.

Here is what a real one looks like.


 Here is the Model


Farm Stone Boat


Here is a little 1hr project. It is called a stone boat because they used to haul stones on I guess. It has 2 4x6" skids and 2x6" planks on top of the skids. There is a chain attached to the end of the skids and could then be hooked up to a tractor or a horse. We had one and it was also used to haul manure from the barn to the field. You forked it on and you froked it off. My grandfather used to haul water in the winter in barrels which worked until you hit a snow drift and tiped them. This usually happened in the last few hundred feet from the house and so back you went so I was told. It had 2 posts on the front with a a board attached to the top of them. You stood behind this if you were driving horses. It was removed when there were no more horses being used. You can haul all kinds of  awkward pieces around the yard. It finally rotted away in the 70's


Sunday 3 March 2024

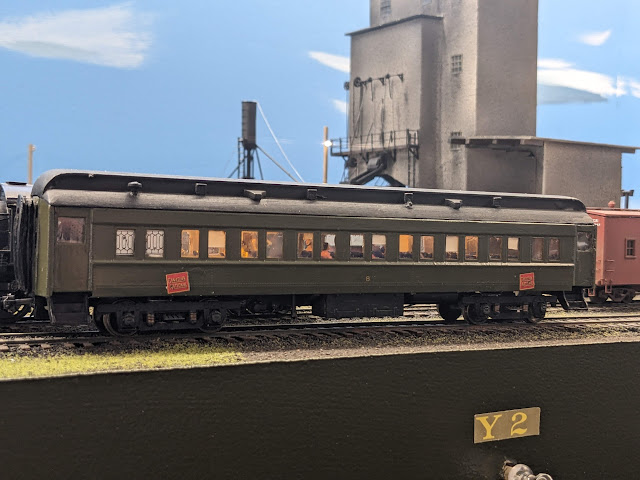
Refurbished old passenger car

 This was car was bought second hand for $10 and is 60' long.  I use it as my way freight train on the branch line. It only serves two towns with 24" radius curves. It is not intended to be a model of an exact CN car but it is correct for the era. It needed to be repainted on the outside and touched up on the inside. I then added older square CN decals to age it a bit. I also added LED lights to the inside that get power from the axels. The roof was always removable so that helped when I refurbished the car. 

Here it has been sanded to remove paint runs and brush strokes. The glass for the windows was glued in as a single piece on the inside so I cut out masking for the windows on the laser. It only took 40min to draw, cut and install the window masking.


This shows the end view of the masking. I didn't have to mask the door because it is all black along with the diaphragms.


This is the inside of the roof with the 2 lights installed with a connector.


This is the string of LED lights that you would stuff in a jar. They are cheap and about 3' long. I cut 2 bulbs off the end and the spacing worked out well. They are a nice warm white 3000k


Here the car has been painted CN green #11 on the outside and you can see the male plug that comes up from the axle.


 Once it was painted I removed the plastic as best as I could and repainted the diaphragms with a brush.


The repainted ends


In this shot you can see the old glue that holds the clear plastic in place. It was too much work to try and take this off without making a bigger mess so I just painted grey over the inside where there was any glue.


In this shot I have finished painting the inside, added some shades and have added the decals to the outside. 


Here you can see the interior after the glue marks have been painted over. I also added a few more blinds on the windows.


This shows the lighting in the car. 


This shows the connection I used to get power from the axles. The trucks are Central Valley with axles that are  insulated on one side. I cleaned the wheels and axles as they had paint on them. They conduct and run really nice. There is no flicker in the lights. I thinks it is nice looking car.