
Here are 2 of the 4 cars that I built. I will show the other 2 cars in my next post. These 4 cars are all scratch built and I have included the description. I started these 4 cars in Jan 2020 and finished these 2 by April. I had no drawings for the gondola only one picture and only two pictures and a very simple drawing for the Express car. All the decals on the cars were made by William Brillinger from Precision Design Co in Altona Manitoba billy@pdc.ca He is a really great guy to work with. You may also want to have a look at my post of How I Build my Scratch Projects and Using Textures and Pictures. The floors on these cars have textured flooring added to them. I would never be able to paint them to make them look this good. When I print them I do it in draft as it gives them a duller look and they blend in better. You can weather them a bit with chalks and not loose any of the detail.
For the next cars that I am going to build I will get .04" steel laser cut with the hole for the coupler screw cut in at the same time. I think I will get the board lines on the bottom rastered in and this will take car of the weight problems when building from just styrene. I am considering having the bolsters and center sill cut out of metal as they would be easy enough to solder on.
CNR 8903 Express Car
The grey you see in the center sill is the sheet lead. The holes for the bolsters and couplers have been drilled and tapped. At this point the trucks were put on and I gave them a test run.


In the paint booth


The horses have all been hand painted. You can see the last set of panels piled against the wall when they are not used. I also made some feed pails. I used real ground up straw on the floor.


Here is the description that accompanied this model for judging
CN8903 78’ Express Horse Car
1. Construction
I used pictures and a partial drawing that is in CNR Vol 2 An Annotated Historical Roster Of Passenger Equipment by Guy Lepkey. I drew this car in CAD and then worked from those drawings. The walls, ends and doors are laser cut. This car is built to be run on my layout. This car was constructed out of styrene. The walls, ends and doors are laser cut. These parts were cut from scribed styrene. The coupler boxes are drilled, taped and screwed to the car so they car be removed to fix things like coupler springs. The trucks are also screwed to the bolsters which have also been drilled and taped. The center sill has lead laminated along with styrene for weight and to keep the center of gravity low in the car. Once this was done the car was test run and it ran very nicely. The floor is scribed on the bottom and all the parts added to it. The wood texture was then glued to the floor. Then the texture was cut and glued to walls and ends and then the walls and ends were glued in place. Next the roof had some adjustments made to it so it could be removed and support the walls. Simulated tare paper was then added to the roof along with the vents and rain drip strips above the door openings. Once this was done the grab irons, brake lever, stalls end door were added. The car was then painted as outlined below. The diaphragms were then added along with the lettering. You may see a gap between the roof and the wall in the middle. This is a result of the roof having a natural curve to the plastic that I could not get completely straight. If I glue it down there would be no space and I will most likely do this for normal operation because of the chance of the roof coming off when someone is trying to re-rail the car.
2. Detail
Once the walls were cut out, the half round edge trim was added to the door opening edges. Braking with all the piping. There are 2 water tanks with piping that have been installed. A generator and battery box have been added. There are double walls on the ends. Scaled board texture was added to the interior of the walls and floor. There are air, signal and steam lines with hoses. Windows in the doors have different styles so this is the one I picked. The grabs were added as per photos. The brake adjuster on the B end is a lever operated as per photos. The end wall is curved side to side and curved to fit the roof. Vents, drip lines and ladder grabs were added to the roof. I added some feed and water containers. Real ground straw was added. I never knew that the end walls were curved side to side and that there was a double wall on express cars. Horses were hand painted and added. The panels at the end of the car are standing against the wall which is where they would be placed if the car was used as a baggage car. A worker was also placed.
This was a GTR are in the series 1200-1209 blt 5/23 then became CN 8900-8909 and was retired in 9/61. This car hauled race horses and could hold up to 24. The building of this car closely follows the prototype but is not exact due to a lack of data. The sides have 3.5 in vertically spaced boards on the walls and ends inside and out. The floor is 5in boards on the inside and out. The brake system is a modified AB system referred to as UC type that has the 2 extra air reservoirs. I used a diagram of this brake system that is in CNR Vol 2 An Annotated Historical Roster Of Passenger Equipment by Guy Lepkey. The car is 10’ wide and has a fish belly under-frame. The smaller doors are 5’ wide and the centre opening is 7’ wide using double doors. Car end diaphragms have been added. There are double end walls. The outside end wall is curved to fit the roof and curved from side to side. There are doors in the car ends, although they would not be used if horses were present. The exterior colours and lettering are correct for CN passenger cars prior to 1954 and was never updated. This car is only 2 years away from retirement. The stalls are a common design so they can be folded up to hang on the walls.
4.Finish
The floor and interior walls are finished with scaled and printed wood textures. These textures are then cut out and glued to the styrene walls and floor. The interior of the car is then weathered. The clerestory roof has been scribed and painted with a brush to give the look of tar paper. The floor on the underside was air brushed a flat black and weathered with chalks. The sides and ends are painted CN green #11 and also weathered. The decals are what was on the car in 1959 and show some weathering.
5.Scratch Building
I scratch built this car except for the roof. The clerestory roof had to be adapted to work with the walls. The walls, frame, bolsters, battery box and stalls were built from styrene. I drew the car in CAD. There is lead added between the sides of the fish belly frame to give weight. The walls, doors, centre sill parts, bolsters and braces are laser cut. The ends had to be cut with a curve to match the clerestory roof line. The water tanks and generator under the floor were made on my lathe. The door board lines were rastered on both sides of a plain styrene sheet, then the parts were cut-out. The centre sill is laminated together with a layer of styrene on the outside and pieces of lead sheet in between to add weight to the car, then a trim was added to the bottom. The slots and holes for the brake lines were drilled and then I used my Dremel to mill the slots. The bolsters were laminated together and drilled and tapped. The coupler boxes were placed and the floor was drilled and tapped for a 2-56 screw to mount them. This way they can be removed to replace springs if needed. The stalls are built from 2x3 strip. I made some feed containers, used real ground straw. All the grabs were scratch built except for the ladder rest on the roof. I built a gig to bend the grabs. The brake adjuster on the B end was also scratch built. Glass was added to the door windows. There was also vents added to the roof.
Materials Used
Evergreen
-.06 plain styrene sheet
-.04 plain styrene sheet
-.02 plain styrene sheet
-.01 plain styrene sheet
-.001 clear styrene sheet
-.04 scribed styrene sheet
-.02, .04 .06 rod
-.04 tube
-.04 half round
-1x2,1x3, 1x4, 1x6, 1x8, 2x2, 2x4, 2x6, 2x8, 2x10, 2x12, 4x4, 4x6, 6x6, 8x8, 8x10
Other
-.02 sheet lead
-1/8”, 1/4” , 5/16 dowel
-.012 music wire
-.023 music wire
-straw
Purchased Parts
-Tichy AB brake parts
-3axel passenger trucks
-Kadee semi scale couplers and boxes
-Kadee air hoses
-A-Line diaphragms
-2/56 screws for trucks and couplers
-Walthers Clerestory roof
-horses
-CN Lines decals
-CN #11 green
-weathering chalks
-3 or 4 other paint colours
CN 65' Gondola


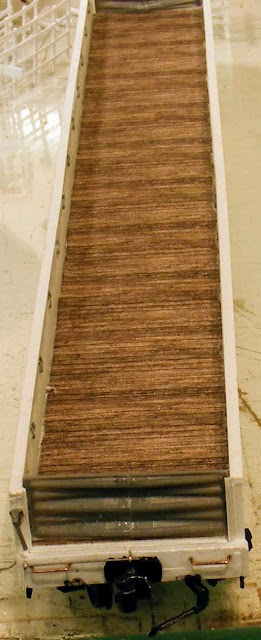


CNR 65’ Gondola
1. Construction
This car was built from Cad drawings that I made from a picture seen in Canadian National Colour Guide To Freight and Passenger Equipment. Styrene was used for just about all the construction. My main concern during this build was that this car would run properly as it will be a working car on my layout. Some parts were cut on the laser and lathe. I also built loads for this car from scratch.
2. Detail
This car was built in 1958 and was in service in 1959 on my layout. The underside is very detailed with brakes and bracing. The box that is part of the decaling is used to show that it has a nailable floor. The drop ends are removable. Tie downs were added to the inside of the sides. There 7/8” rivets added to the sides on the bottom and at floor level on the outside they are very small. Scratch built loads.
3. Conformity
The building of this car closely follows the pictures but is not exact. The drop ends can be removed. This car is IL 65’, IW 7’9” as per the design to accommodate tight trackage and has an IH 3’6
4.Finish
The floor is finished with scaled and printed wood texture that is cut out and glued to the styrene floor. The rivet decals were installed before the car was painted. The car was airbrushed a CN red #11 and weathered with chalks. The decals for this car were custom made.
5.Scratch Building
The entire car is scratch built with the exception of the brake parts, trucks, wheels, coupler and box. The ends have been heavily modified to width and height. The sides were cut from .02 plain styrene, bolsters were cut from .06 styrene and laminated together and drilled and tapped. The floor was cut from .04 and was scribed at .06 with scaled wood texture glued to the top. The side supports are cut from 4x4 with a .06 trim on the end. The underside has braces and AB brakes. I have built 3 loads for this car. The vessel was built on my lathe and before glueing it together it was filled with sand for weight. The sand load has a magnet installed along with some weight. It has 1/8 hardboard with sand glued on top. The 75’ pipe load was made with plastic drinking straws that were filled with sand for weight. There are also 2 weights made to look like scrap for when the car is empty.
Materials Used
Evergreen
-.04 styrene .06 grooved
-.04 plain styrene sheet
-.02 plain styrene sheet
-.01 plain styrene sheet
-.08x.08 for bracing
-.02, .04 rod
-1/2” tube
-1/4” plastic straw
-1/4”, 1/2” wood dowel
-1x2,1x3, 1x4, 1x6, 1x8, 2x2, 2x4, 2x6, 2x8, 2x10, 2x12 4x4, 4x6, 8x8, 10x12
-sand
-various sized wood
-wire of various size
Purchased Items
-Accurail Bettendorf trucks
-Tichy gondola ends
-Tichy AB brake parts
-Tichy 18” grabs
-Tichy stirrups
-Kadee air hoses
-Kadee semi scale couplers and boxes
-Kadee semi scale wheels
-Archer rivet decals
-Details West lift rings
No comments:
Post a Comment